Create Cashflow
To create a new cashflow
-
In the toolbar, under , click .
-
Click . The page opens.
Note: All fields on this page are mandatory parameters.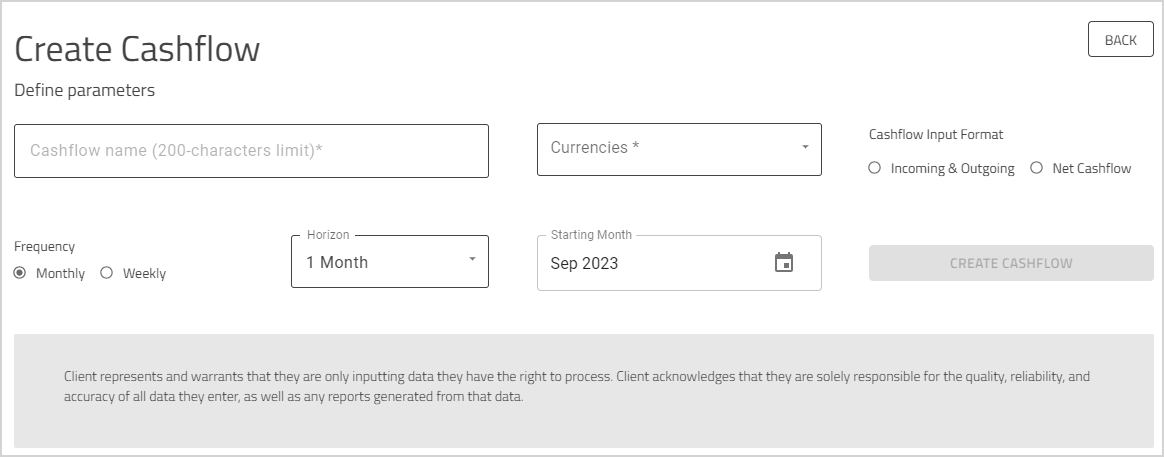
-
Enter a unique name for the Cashflow. You'll see an error message if a cashflow with the entered name already exists.
-
From the dropdown list, select the currencies for the cashflow. You can select multiple currencies.
Note: Your base currency will not be available for selection in the dropdown list. The currency order selected here determines the order in which currencies will be displayed in future reports. -
Select the . Input Format is your preferred method to enter your cashflow information. This is a mandatory selection.
-
- You can enter your cash inflow and outflow amounts in separate tables.
-
- You can enter your net cashflow amount in a single table.
-
-
Select the and for your cashflow. can be set as or and is used to specify how often the cashflow transactions occur. is the length of time for the cashflow. By default, the selected is. The field is auto-populated depending on the selected . The default selection can be changed from the dropdown list. and are mandatory fields.
-
If you have selected frequency, the default selected is .
-
If you have selected frequency, the default selected is .
-
-
The field is auto-populated based on the selected . You can edit the . This is a mandatory field.
-
If you have selected frequency, the current month is selected by default (e.g., Sep 2023). Click the
 icon to change the start month for the cashflow. The calendar will open as a monthly calendar. You can select the start date one month prior to the current date or set it to a future date in the next 12 months.
 -
If you have selected frequency, the current date is set as the default start date (e.g., Sep 01, 2023). Click the
icon to change the start date for the cashflow. The calendar will open as a date picker. You can select the start date one month prior to the current date or set it to a future date in the next 12 months.
-
-
Click .
Note: This button is enabled after you have entered information in the mandatory fields. -
Proceed to the section Enter Cashflow Transactions.
-
To return to the page, click the button. You will see an alert message warning you that leaving the page will result in the loss of all progress entered for the cashflow. Click to return to the page or click to proceed further.
Important: If you return to the page, any data you have entered on this page will be lost and it cannot be recovered.
Note: Client represents and warrants that they are only inputting data they have the right to process. Client acknowledges that they are solely responsible for the quality, reliability, and accuracy of all data they enter, as well as any reports generated from that data.